If you’d like to test the user Onboarding flow you can click here or watch the video below to have a preview of the Admin Web App.
Business Requirement
What is a KYC Process and Who Needs it?
A KYC process includes ID card verification, face verification, document verification such as utility bills as proof of address, and biometric verification.
Financial Institutions such as Banks, Fintech, Crypto, Insurances must comply with KYC regulations and anti-money laundering regulations to limit fraud. KYC compliance responsibility rests with the banks.
Marketplaces such as Uber, Deliveroo, Amazon must also comply with these processes in order to make sure that their courier, seller etc are legitimate business or people. Deliveroo or Uber for example will run a background check on each of the couriers they select in order to provide their clients with providers that are reliable .
Why build my own process?
Currently, a lot of work is done manually. The Document ID is provided by the customers and then it has to be reviewed manually by the employees. There are a lot of custom rules that will change over time and employees cannot necessarily keep track of them. This ends up with a long and tedious process, costly and time consuming for both parties.
There are dozens of external providers who can provide this kind of service. One example is getid.com who offer this kind of service for the price of 1.49 euro per verification. Their services are of course a bit more advanced but a lot more expensive.
To build this product I am using Bubble and a few different APIs. The API cost to parse the Document ID is $29.99/ month for 10k checks a month and the cost of the API to run the face ID is $29.99/ month for 5k checks. As you can see, it’s much cheaper than using an external service provider.
Ready? So let’s build it!
Technical Specifications
Main Features
As a user
- A sign in page for the end user where he can create an account, upload his Document ID and a selfie to perform the face id check.
- A profile page for the user where he can check the status of his profile and edit some information.
As an admin
- A back office where I can review all the users and their profile and approve the customer that require a manual approval
- The ability to define my own custom rules for example some countries should always require a manual approval
- A dashboard to understand quickly how many customers are in my database, how many profile requires a manual review etc
The Back End
Data Model
The User Table
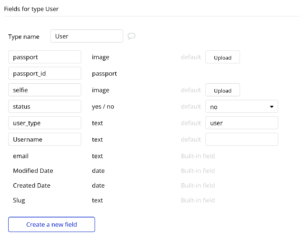
This collection contains all the information provided by the user when he signs in to the platform. The user_type is a field required for the data privacy rules, we will go into more details about it a bit later. Each user has a passport_id of type passport that will enable to link its data to the passport data from the passport collection.

The Passport Table
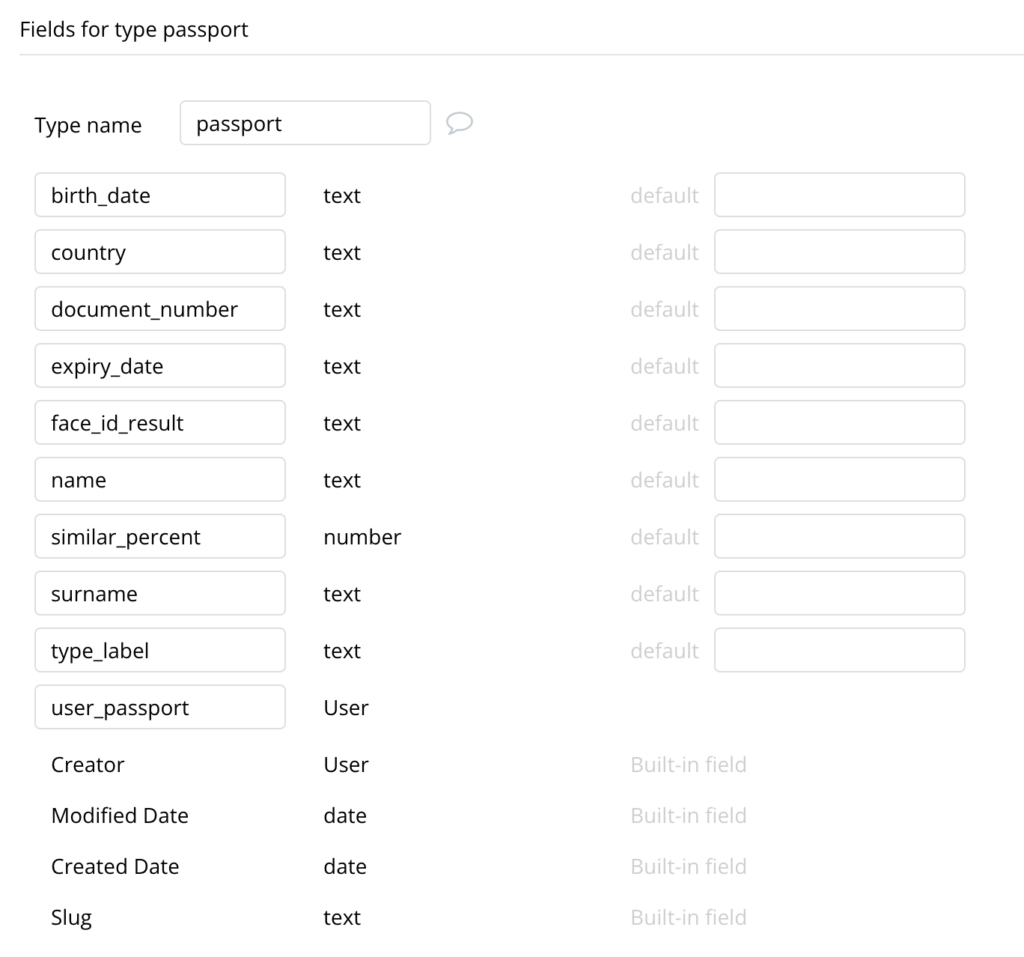
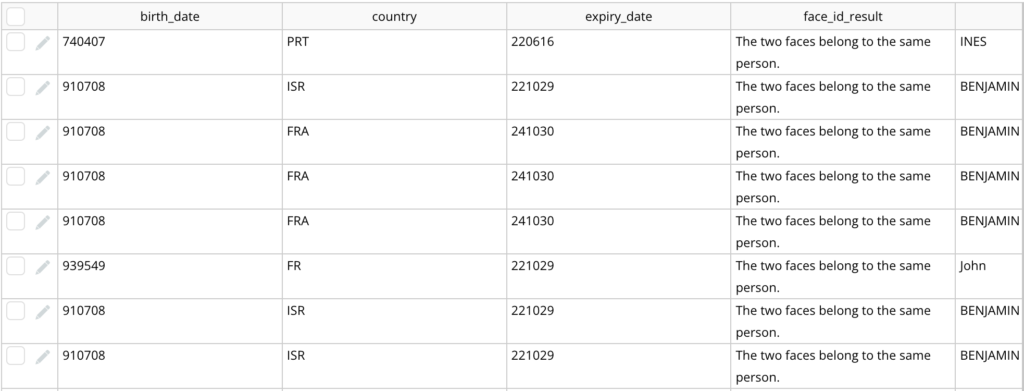
This collection contains all the information provided by the user when he signs in to the platform. The user_type is a field required for the data privacy rules, we will go into more details about it a bit later. Each user has a passport_id of type passport that will enable to link its data to the passport data from the passport collection.
Data Privacy Rules
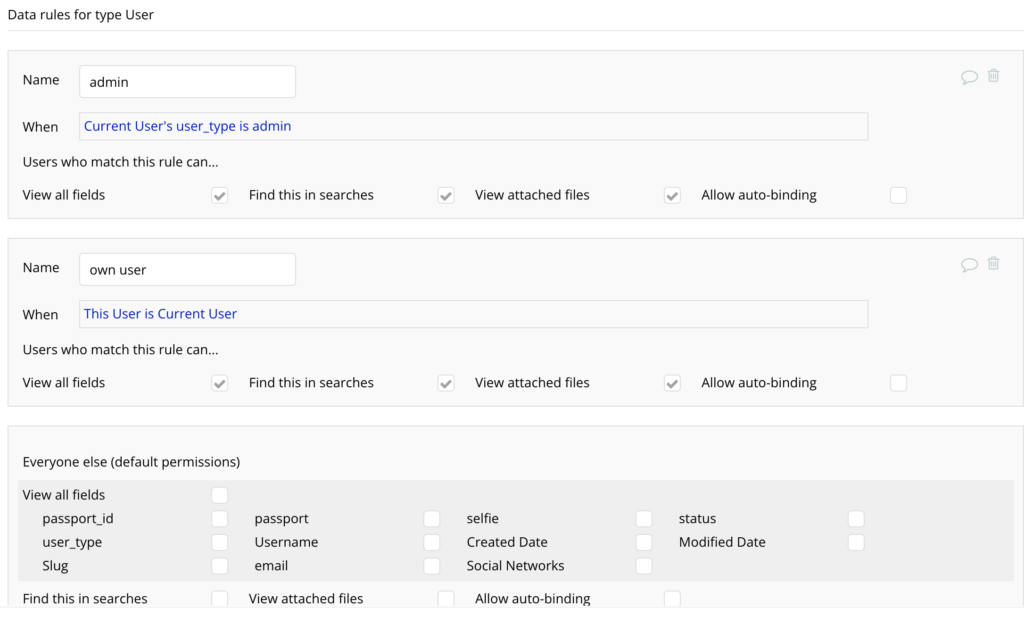
To secure your data, you need to implement some data privacy rules. Here there are 2 very simple rules:
1. If you are an admin, you can see all the fields and edit all the data.
2. If you are a regular user, you can only see and edit your own data. I defined a few more rules at the profile page level to limit some of the data that a user can edit in his profile.
Setting up The API
I recommend to use RapidAPI’s platform in order to find quickly and test the API you are looking for.
MRZ Scanner API – Document ID Check
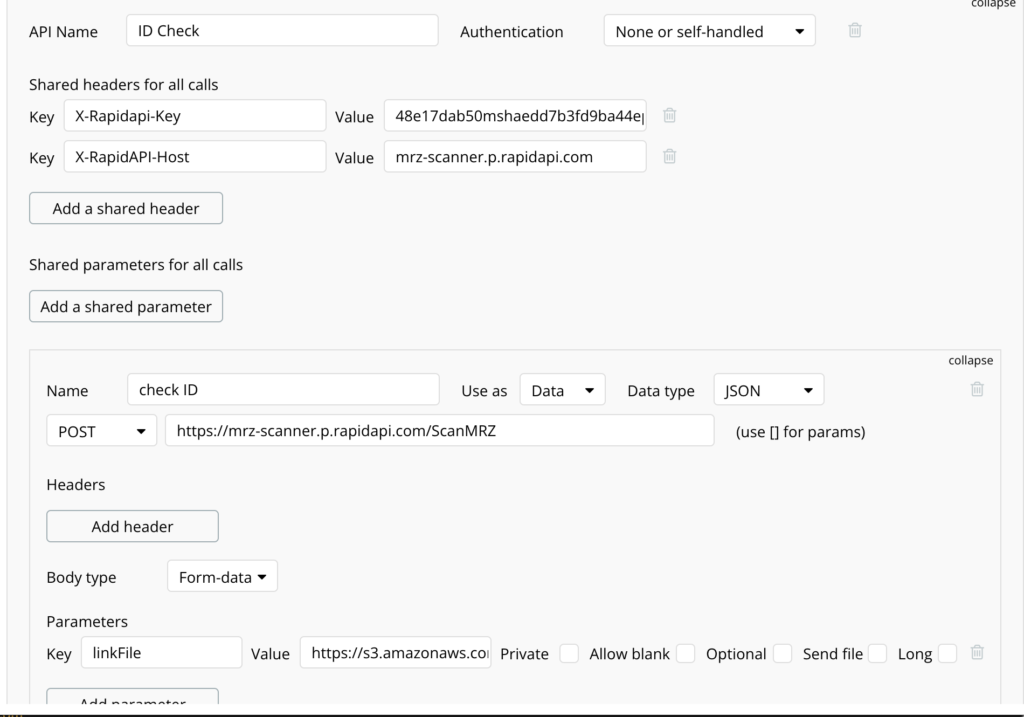
The call is a POST request where you have to provide the picture of the Passport as a URL in a parameter with the key linkFile.
Face ID – Face Verification API
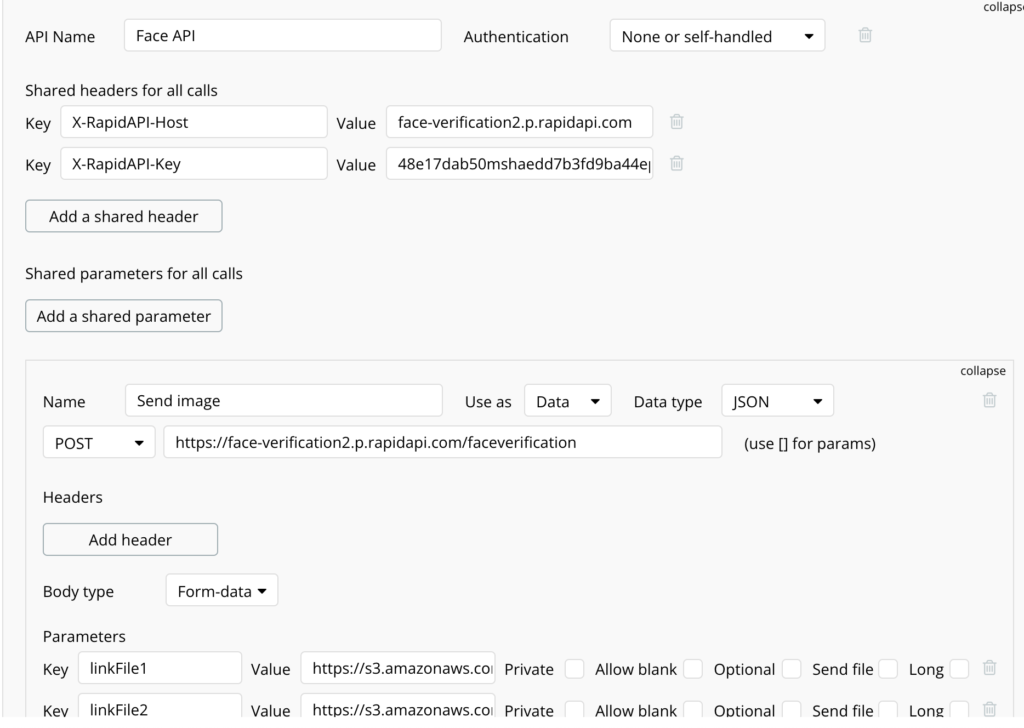
The call is a POST request where you have to provide the picture of the Passport as a URL in a parameter with the key linkFile1 and a selfie picture as the key linkFile2. The API will compare the two pictures and return a similarPercent result.
The Front End
Here is how the Admin interface looks like. You can edit a profile. See a few analytics and update your custom rules of approval.
Here is how the User onboarding flow looks like. You can also test it here. You can use the provided Document ID to test it or use your own Document ID if you’d like.
And that’s it for now! You have now the tools to create your own KYC process for a low cost and totally customizable. I hope you liked it and found it interesting. Feel free to reach out and share your feedback.

