


What: Definition of Ticket Routing
In customer support operations, ticket routing is the process of setting rules around how tickets are assigned to particular departments, agents, and functions.
While ticket routing is technically a process that happens behind the scenes, it has a profound impact on the customer experience. There is nothing more frustrating than experiencing long hold times and being passed around from agent to agent in an attempt to get a problem solved. If you’ve had this experience in the past, you know that it leads to a decline in trust for a company or brand.
Why: The Pain we try to solve
When a bug report is created, it requires a manual review by a human to read the ticket and assign it to the proper assignee. It creates bottlenecks, slow down the whole process and creates a poor customer experience.
Our KPI to measure the improvement is the Median Time To Resolution (MTTR).
How we can solve the pain: Automated Routing by AI
AI is a bit of a buzzword but here, the use case is pretty simple and AI can really help to solve our pain. We will use an NLP algorithm to read the ticket and we will train the algorithm to predict the assignee based on the content of the ticket.
The Tools:
- Monkeylearn to provide for the NLP No-Code text analytics — Free up to 1k predictions
- JIRA to assign the ticket to the assignee
- Slack to inform in a dedicated channel about the automated routing ticket
- Zapier to connect all the different tools above mentioned.
Ready? So let’s build it!
Technical Specifications
Main Features
- Auto assign the ticket to the right assignee if the confidence level of the algorithm is above 50% if the confidence level is below 50% then only provide a recommendation.
- Be informed in real time of a new ticket created, the content, the link of the ticket, the creator of the ticket and the automated routing ticket status in a Slack Channel.
1st Step: Train the Monkeylearn Algorithm with your JIRA data
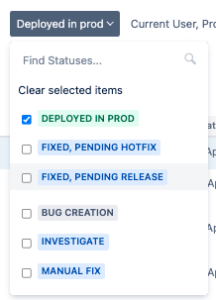
Go in JIRA, click on filters and select the relevant data to train the algorithm. In my case I exported the last 3 months tickets where the status is ‘FIXED’.
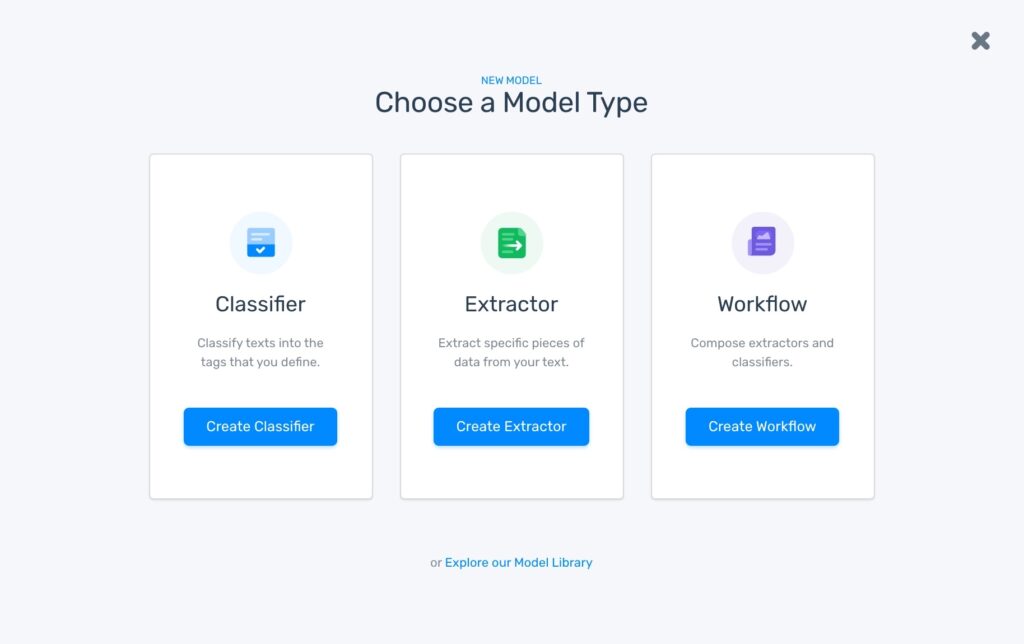
Once you have your CSV file with your training data, you can go to Monkeylearn.com and create a free trial account. In the section Models, go in My Models and Create Model.
Select “Classifier” and on the next screen select Topic Classification
Next Step is to Import your data. Here you can upload your CSV export file from JIRA. Once your import is completed click on Advanced. Select the ticket summary column as ‘Use as Text’ and the Assignee column as ‘Use as Tag’.

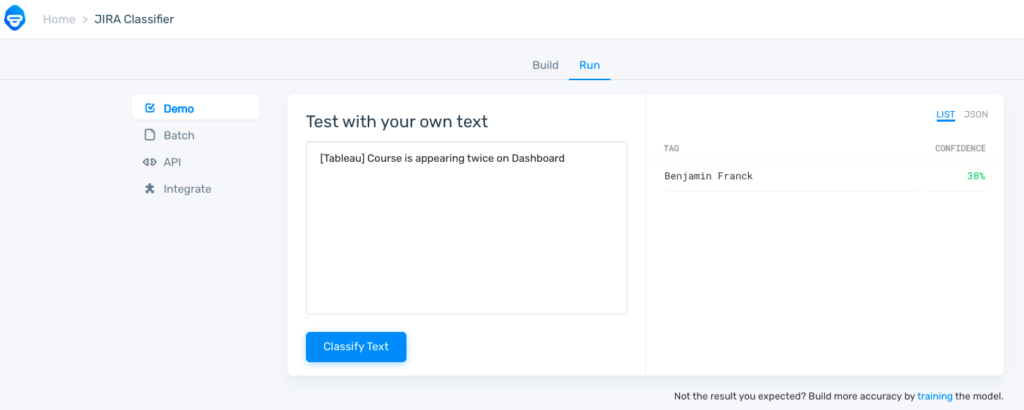
Then click on Continue to train the algorithm with your data. Once your training is completed you can start testing it and see the predictions. You can see the level of confidence as well and assess if the the prediction are accurate or not.
2nd Step: Connect your Monkeylearn predictions to JIRA and Slack with Zapier
This is how I have built my Zap. I will explain each step in details below.
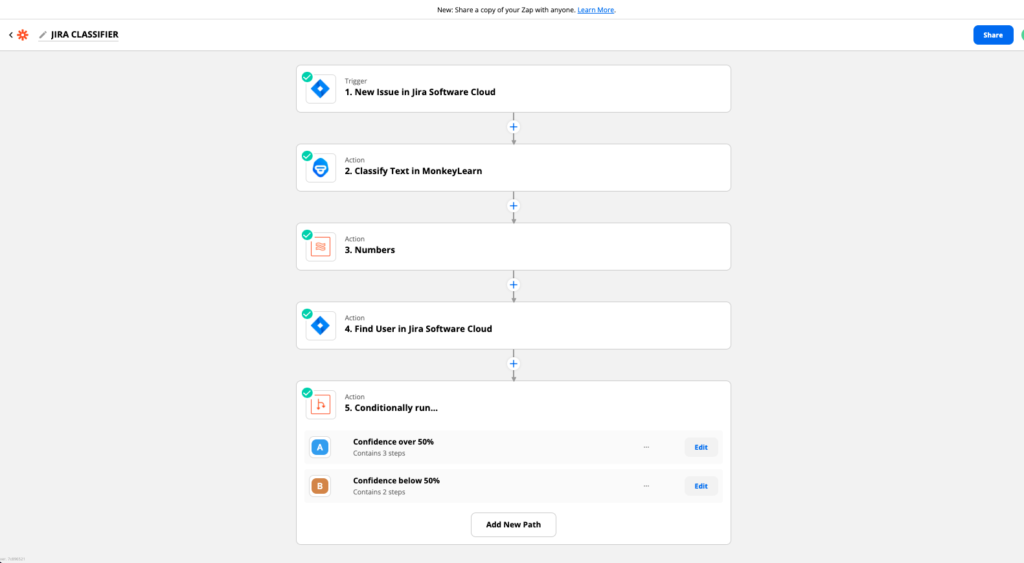
- Trigger: New Issue in Jira Software Cloud
Here you simply need to connect your JIRA account and select the right project. In my case it’s in the Bug Reports project.
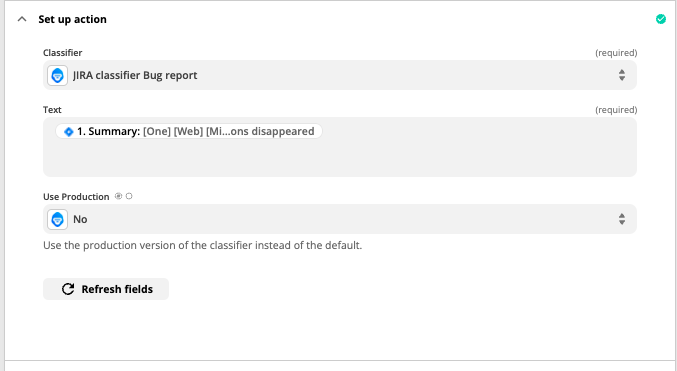
2. Action: Classify text in Monkeylearn
This is where the magic of Zapier happens. You simply have to connect your Monkeylearn account.
Classifier: you can select the JIRA classifier you just created in Monkeylearn.
Text: You provide the Summary of the JIRA ticket of the Bug Report from the previous step
3. Action: Numbers
In this step I am just formatting the confidence level returned by Monkeylearn to be a percentage that I can use in the next steps.

4. Action: Find User in JIRA Software Cloud
In order to be able to assign the ticket to a JIRA user you first need to set up this step to find the right user.

It’s very easy to do, you simply have to provide the Tag from Monkeylearn (the assignee prediction) in order to find the user. Since the algorithm has been trained with the Assignee name coming from JIRA itself there should not be a case where the user is not found.
5. Action: Set up a Path by Zapier to run conditional actions
If my confidence is over 50%


Then Update the Assignee of the ticket with the user found in the previous step (Step 4)
AND
Send a message in a dedicated slack channel. Here you can customize the text message with all the data coming from Monkeylearn and from JIRA.

Here is an example of output in Slack:

If the confidence level of the prediction of Monkeylearn is below 50% then I will not assign the ticket and only provide a recommendation that I will send in my dedicated Bug Report AI slack channel.

And that’s it for now! You have now an Automated Ticket Routing solution implemented without having to code and for free.


